Hi Everyone!
I was so inspired by doing the Book of Shadows Vol. IV look that I decided to do one with Vol. III! It is kind of fun to work with restrictions, it forces me to use colors and combinations I wouldn't normally reach for when I have my entire makeup collection sitting in front of me. I also decided to try something new; I took step-by-step pictures. So, this is going to be an incredibly long post; that being said, I'm hoping to refine this process and find a happy medium between "too much information" and "not enough information". This might tend towards the "too much information" end of the spectrum. Although I've probably left out some incredibly relevant parts.
Anyway, this is how it's going to work; I'm going to show you the product(s) I'm about to apply, and then I'll show you what it looks like on my face. That way, you can see the gradual build of product, and you should be able to see a little more clearly where I've applied each product and shade than a written description would give you. I am SO not used to doing my makeup this way, so I can't say I'm 100% thrilled with the way it all turned out, but I promise I'll get better at doing things this way! Some guidelines so all these pictures don't get more confusing than they need to be: I'll label which products are pictured just below the picture, then I will type up how I used the product, and then you'll get a photograph demonstrating what it looks like once applied.
Let's begin!
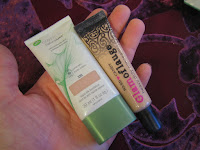 |
| Covergirl Natureluxe Silk Foundation and Hard Candy Glamoflage Concealer |
I applied the foundation over the entire face with my fingers, focusing on areas where I had redness to get a bit of heavier coverate. I then added concealer under my eyes, around my nose, and on a problem spot near my chin. I made sure I blended it all out thoroughly.
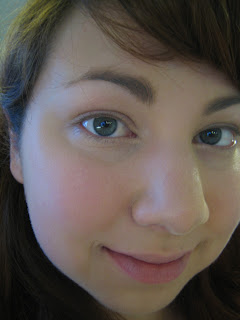 |
| After foundation and concealer! |
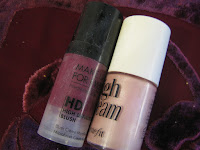 |
| MUFE HD Blush #1 and Benefit High Beam |
I applied High Beam on my cheek bones, down the center of my nose, under and over my brows, and around the jawline. I then added a little bit of the HD Blush on the apples of my cheeks and blended towards my hairline.
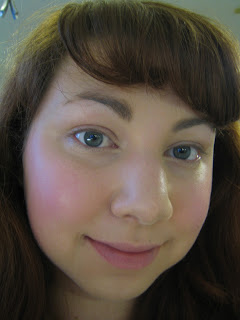 |
| With cream blush and highlighter |
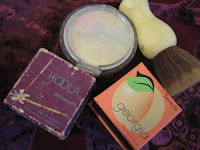 |
| Benefit Hoola and Georgia, Physician's Formula Mineral Wear Correcting Powder in Translucent, Ecotools Finishing Kabuki |
I applied the Physicians Formula powder lightly with the Finishing Kabuki, then applied Georgia lightly over the entire face, focusing on cheeks and up to the hairline, then applied Hoola with the same brush on the sides of my face and in the hollow of my cheeks.
 |
| With powder, Georgia, and Hoola |
I forgot to take a picture, but I used the UD Primer Potion that came with the Book of Shadows on my eyelids before I applied any eyeshadow.
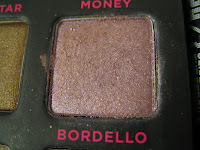 |
| Bordello |
Bordello went all over the lid, up into the crease, and was winged slightly out in an almond shape.
 |
| Bordello on the eye |
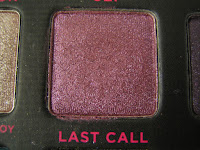 |
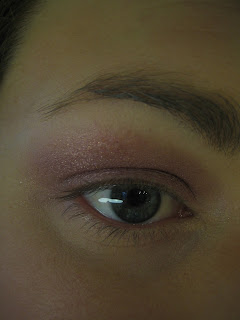
| Last Call |
Last Call was then added on the lid and just barely up to the crease, mimicking the shape we made with Bordello, but kind of a smaller version so Bordello still shows above and around Last Call.
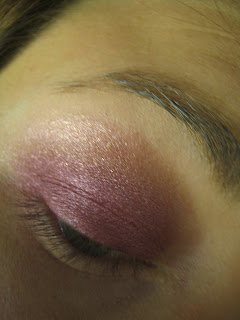 |
| With Last Call added |
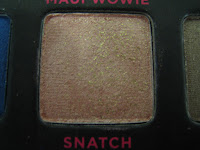 |
| Snatch |
I put snatch in the inner corners and blended onto the inner 1/3 of the lid, and also used it just on top of where we put Bordello, blended up out of the crease onto the bottom of the browbone.
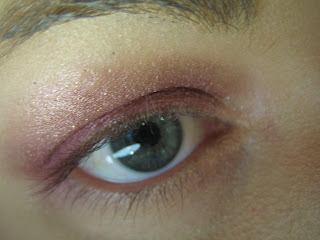 |
| After Snatch |
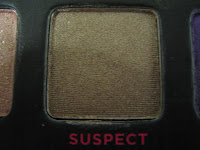 |
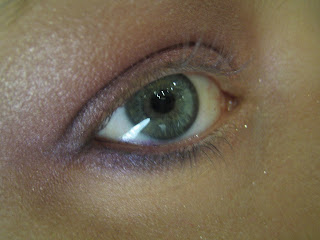
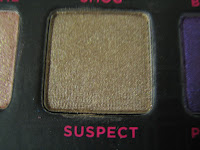
| Suspect |
I then used Suspect on the outer 1/3 of the bottom portion of the brow bone, starting on top of the edge of Bordello and pulling the color up almost to the eyebrow, and winging it out just a little bit.
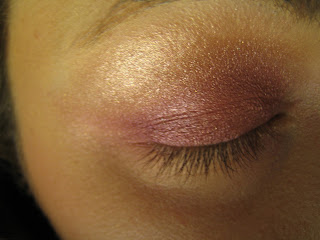 |
| After Suspect |
 |
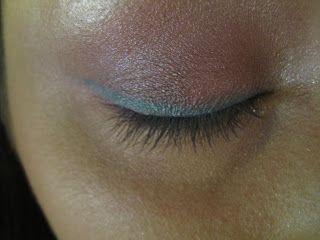
| Midnight Cowboy Rides Again |
I just used this on the inner corner of the eye, pulling it under the inner 1/3 of the lower lashline.
 |
| After MCRA |
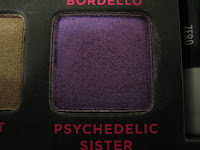 |
| Psychedelic Sister |
This went on the bottom of the crease and onto the very top of the lid
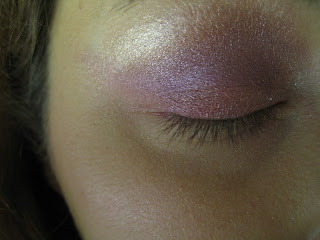 |
| With Psychedelic Sister |
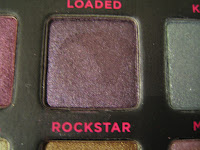 |
| Rockstar |
Rockstar went on the outer 2/3 of the crease, a little bit deeper in the crease than Psychedelic Sister
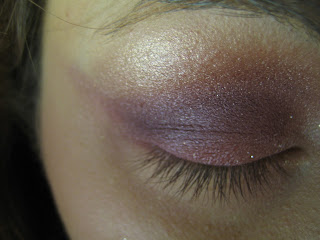 |
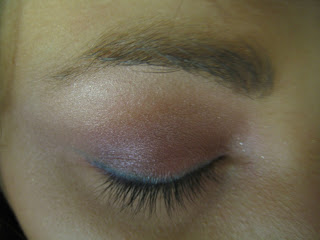
| After Rockstar |
Next up are the brushes I will be referring to for the next step (I used my fingers for the eyeshadows above this!) I used a fluffy blending brush (one of my mom's old MAC ones? 224?), an angled powder liner brush, and a spongey blending tool. I also ran the clean blending brush over all of my eye to help blend the shadows I'd already applied before I moved onto the next step.
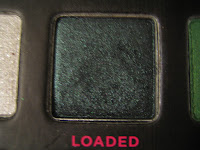 |
| Loaded |
I used the eyeliner brush to put Loaded on the outer 1/2 of the lower lashline, and then used the smudgey tool to soften the line and pull a bit of the pigment to fill the outer 2/3 of the lower lashine.
 |
| With Loaded |
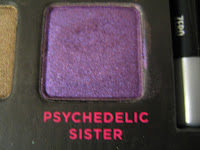 |
| Psychedelic Sister |
I loaded up my liner brush with Psychedelic Sister added that on the lower lashline on top of Loaded, making it a bit of a thicker line. I smudged that with the smudgey tool as well.
 |
| More Psychedelic Sister! |
 |
| Suspect |
Suspect went on the inner 1/3 of the lower lashline with the eyeliner brush/ smudger method.
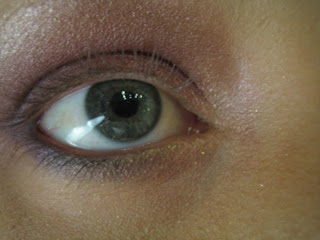 |
| After Suspect! |
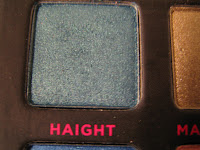 |
| Haight |
Then I used the liner brush to line the upper lashline with Haight. This one got smudged lightly as well.
 |
| Haight |
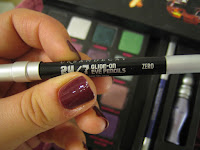 |
| UD 24/7 Liner in Zero |
I used the mini Zero that came with the set to push just a little bit of black into my upper lashline.
 |
| After Zero |
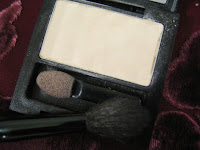 |
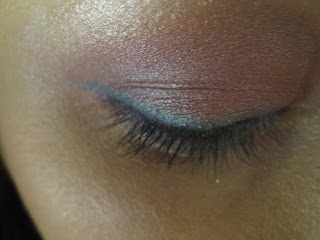
| Revlon Vintage Lace (matte ivory) eyeshadow with the foam applicator and fluffy blending brush |
At this point, I had to go outside of the glittery and dark shades that came in this palette, and I used Revlon's Vintage Lace to brighten and clean up the eye area. I used the foam applicator it came with (gross, I know! But this isn't the easiest formula to work with and this is the best way to get an opaque application) under the browbone, and then I used it loaded onto the fluffy blending brush to soften the edges of the shadow, and to clean up and brighten the under-eye area and sides of my eye.
 |
| After softening the edges and adding a highlight under the eyebrow with Vintage Lace |
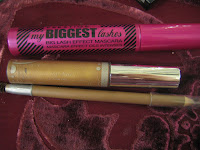 |
| Prestige My Biggest Lashes mascara in Very Black, Anastasia brow gel in Caramel, Prestige Brow Perfection in Light/Medium |
I filled in my brows with the Prestige pencil, and then applied the brow gel onto the spoolie on the back of the pencil, and used that to brush my eyebrows into shape. Then I added a couple of coats of mascara to the top lashes, and a little bit to the bottom lashes. I didn't curl my eyelashes! I know! Bad bad bad!
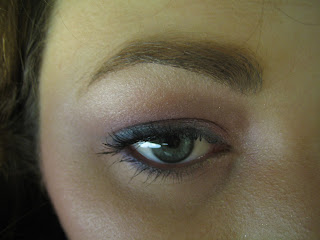 |
| After fixing up my brows and adding mascara |
 |
| MAC blushes in Sakura (top) and Vintage Grape (bottom), Hard Candy blush in Pin Up, and two Sonia Kashuk brushes; a small blush brush, and a fluffier blush brush. |
I used the fluffy brush loaded up with Pin Up over the entire cheek area (apple, top of cheekbone, blending down into the hollow of the cheek), focusing on the top of my cheekbone. I then used the fluffy brush with Sakura over the apple of my cheek and up towards the hairline, blending well. Finally, I used one side of the smaller blush brush with the darkest shade in Vintage Grape on the lower 1/3 of my cheek, into the hollow.
 |
| After blush! |
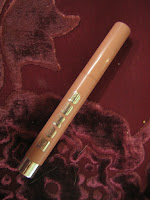 |
| Buxom Big and Healthy Lip Stick in Sydney |
I applied Sydney over the entire lip.
 |
| Lips with Sydney |
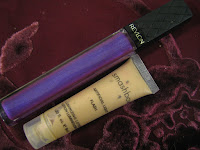
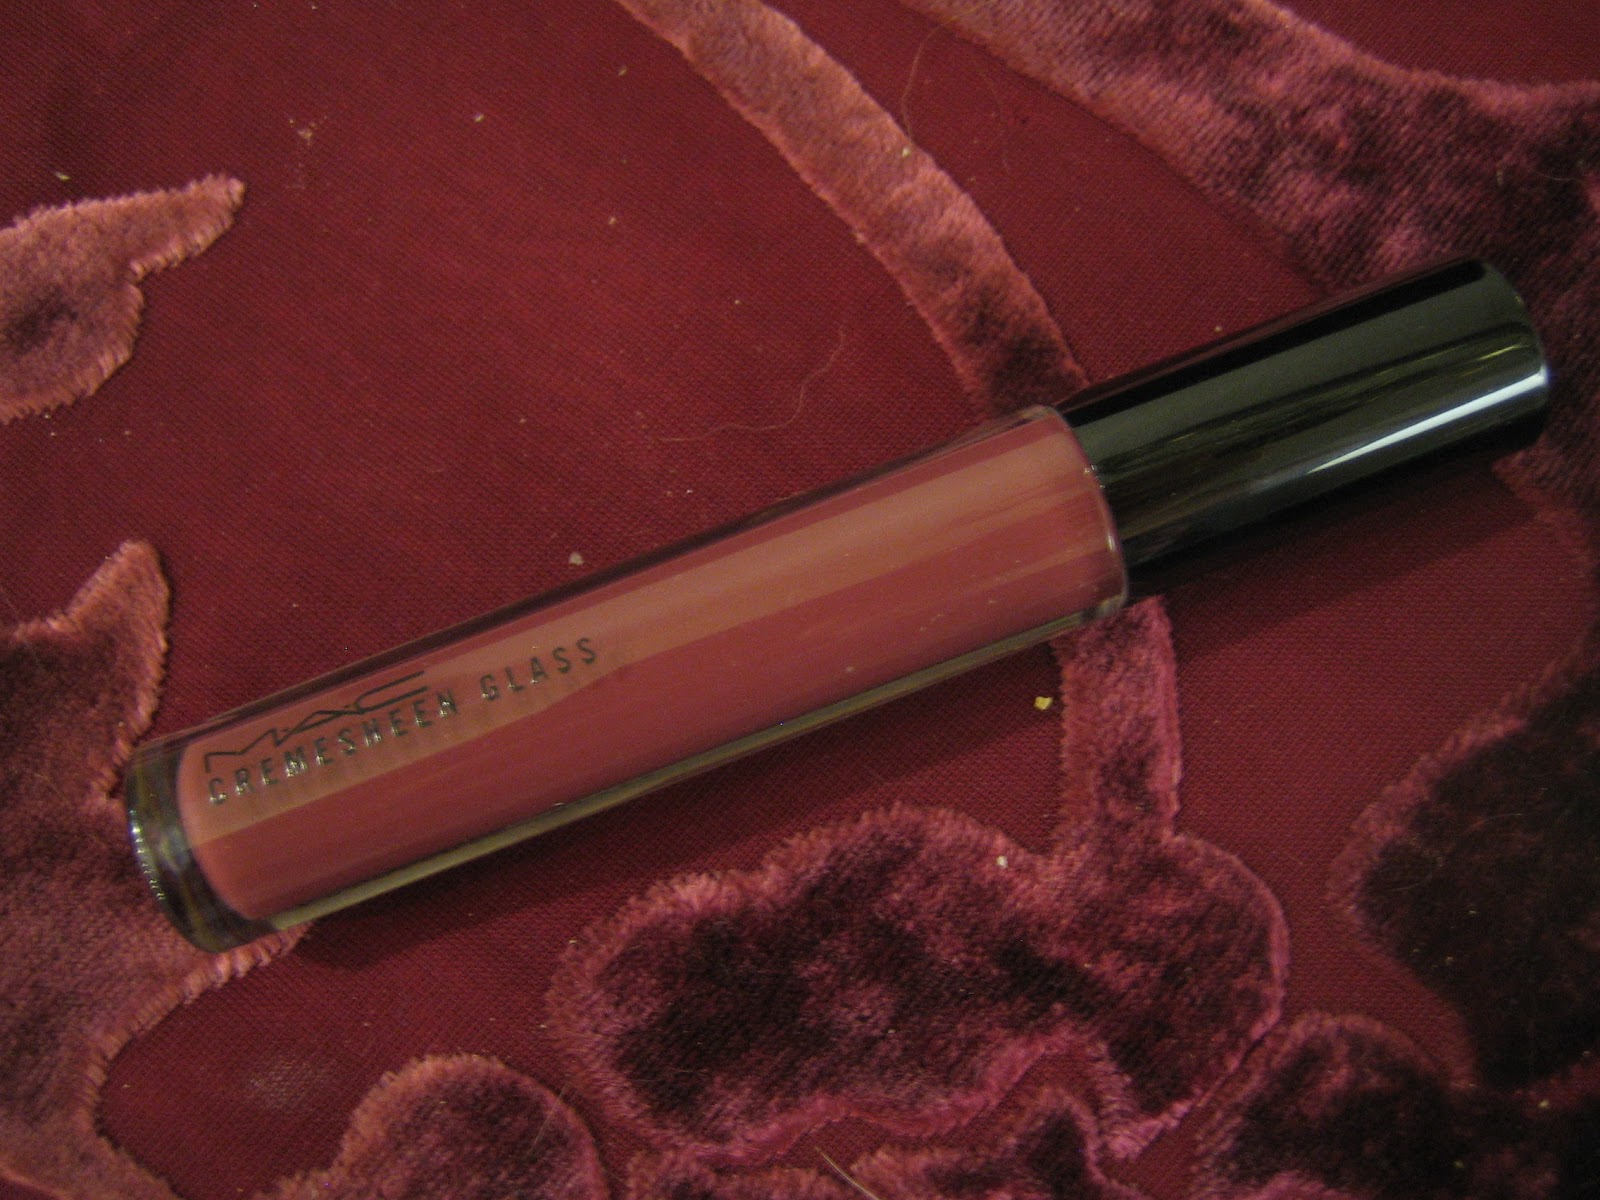
 |
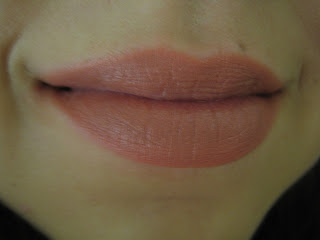
| MAC Cremesheen Glass in Richly Revered |
I added Richly Revered lightly over the entire lip.
 |
| MAC Richly Revered over Buxom Sydney |
 |
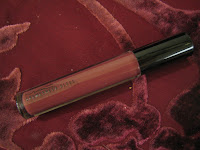
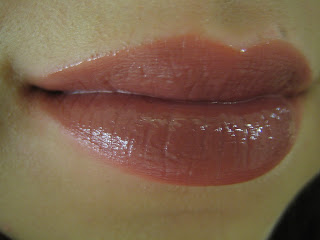
| Revlon Colorburst in Decadent and Smashbox Artificial Light in Flash |
I put a little dot of Flash on my cupid's bow and blended out, and applied a dab of Decadent in the center of my bottom lip and smushed to add a bit of purple iridescence.
 |
| With Decadent and Flash |
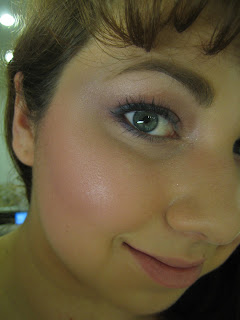
Here is everything that went into this look:
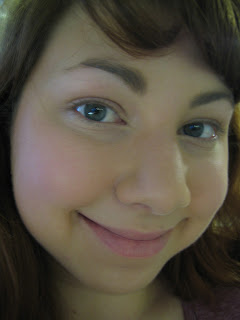
And the finished product in different light:
Phew! Are you as tired from reading this as I am from typing this all up!? So, this is what a more detailed breakdown of a look of the day ends up looking like... Long! But hopefully helpful for some of you who are curious about how I apply color, or those of you who are looking for new ways to use your Book of Shadows Vol. III. Anyone tempted to haul yours out and dust it off?


Ohh that cream blush gave you the most beautiful flush! Great look!
ReplyDeleteThank you sugarbumpkin! I love it, it looks so dark in the tube, but if you use just the tiniest amount and really blend, it's a beautiful color.
ReplyDeleteBeautiful! :) You always blend your shadows so nicely...I enjoy the colors you use as well. Love that purplish/bluish Revlon gloss...me wants it ;)
ReplyDeleteThank you! And it is a great gloss... I really like the Colorburst formula, too! It's worth checking out.
ReplyDeleteWow! Love you you do your makeup! Your face/cheeks are so glowy! Thanks for the step by step! It was fun to go thru!
ReplyDeleteAww, thank you! I'm so glad you enjoyed it!
ReplyDeleteGreat tutorial! This probably took FOREVER to do all of the pictures, cropping, etc. I find it really interesting how you do your cheeks! I usually use one blush or one to contour and another on the apples of my cheeks if I'm feeling really ambitious. Your blush comes out great when you use all of the different products together!
ReplyDeleteThank you! It did take forever... but I was bored and had a few hours to kill, I figured it was a better option than watching TV! And thank you about the blushes, I think blush is really underrated... I love layering to get a more nuanced effect. I'm not sure it always comes out looking significantly different than if I'd only used one or two shades, but layering a cream underneath a powder at least helps it last longer! I find that blush is usually the first makeup product to fade on me.
ReplyDelete