Thursday, January 5, 2012

Urban Decay Book of Shadows Vol. III Look & Tutorial

Hi Everyone!

I was so inspired by doing the Book of Shadows Vol. IV look that I decided to do one with Vol. III! It is kind of fun to work with restrictions, it forces me to use colors and combinations I wouldn't normally reach for when I have my entire makeup collection sitting in front of me. I also decided to try something new; I took step-by-step pictures. So, this is going to be an incredibly long post; that being said, I'm hoping to refine this process and find a happy medium between "too much information" and "not enough information". This might tend towards the "too much information" end of the spectrum. Although I've probably left out some incredibly relevant parts.

Anyway, this is how it's going to work; I'm going to show you the product(s) I'm about to apply, and then I'll show you what it looks like on my face. That way, you can see the gradual build of product, and you should be able to see a little more clearly where I've applied each product and shade than a written description would give you. I am SO not used to doing my makeup this way, so I can't say I'm 100% thrilled with the way it all turned out, but I promise I'll get better at doing things this way! Some guidelines so all these pictures don't get more confusing than they need to be: I'll label which products are pictured just below the picture, then I will type up how I used the product, and then you'll get a photograph demonstrating what it looks like once applied.

Let's begin!
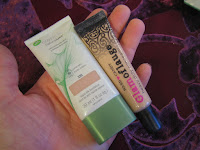
Covergirl Natureluxe Silk Foundation and Hard Candy Glamoflage  Concealer

I applied the foundation over the entire face with my fingers, focusing on areas where I had redness to get a bit of heavier coverate. I then added concealer under my eyes, around my nose, and on a problem spot near my chin. I made sure I blended it all out thoroughly.
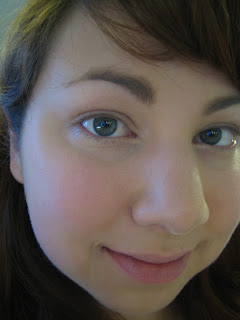
After foundation and concealer!
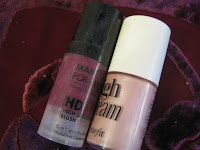
MUFE HD Blush #1 and Benefit High Beam
I applied High Beam on my cheek bones, down the center of my nose, under and over my brows, and around the jawline. I then added a little bit of the HD Blush on the apples of my cheeks and blended towards my hairline. 
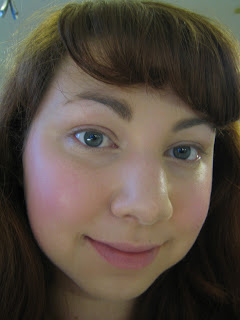
With cream blush and highlighter
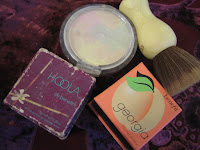
Benefit Hoola and Georgia, Physician's Formula  Mineral Wear Correcting  Powder in Translucent, Ecotools Finishing Kabuki
I applied the Physicians Formula powder lightly with the Finishing Kabuki, then applied Georgia lightly over the entire face, focusing on cheeks and up to the hairline, then applied Hoola with the same brush on the sides of my face and in the hollow of my  cheeks.
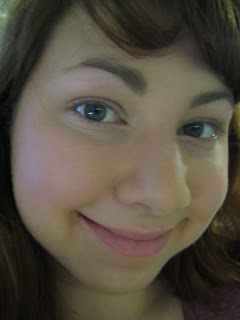
With powder, Georgia, and Hoola
I forgot to take a picture, but I used the UD Primer Potion that came with the Book of Shadows on my eyelids before I applied any eyeshadow.
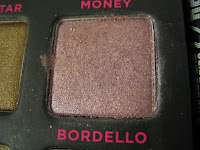
Bordello
Bordello went all over the lid, up into the crease, and was winged slightly out in an almond shape.
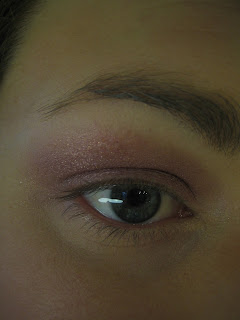
Bordello on the eye
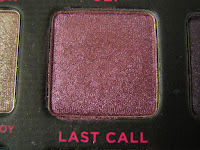
Last Call
Last Call was then added on the lid and just barely up to the crease, mimicking the shape we made with Bordello, but kind of a smaller version so Bordello still shows above and around Last Call.
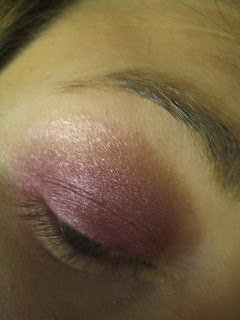
With Last Call added
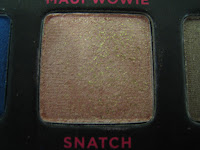
Snatch
I put snatch in the inner corners and blended onto the inner 1/3 of the lid, and also used it just on top of where we put Bordello, blended up out of the crease onto the bottom of the browbone.
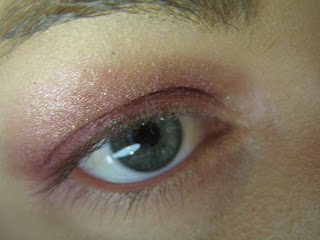
After Snatch
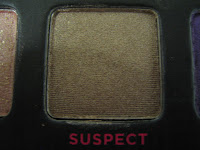
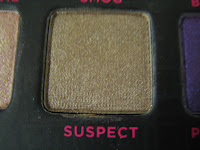
Suspect
I then used Suspect on the outer 1/3 of the bottom portion of the brow bone, starting on top of the edge of Bordello and pulling the color up almost to the eyebrow, and winging it out just a little bit.
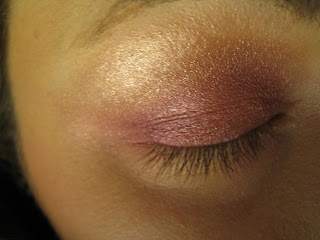
After Suspect
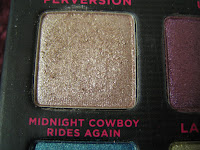
Midnight Cowboy Rides Again
I just used this on the inner corner of the eye, pulling it under the inner 1/3 of the lower lashline.
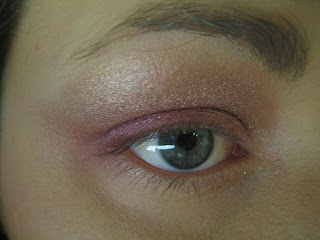
After MCRA
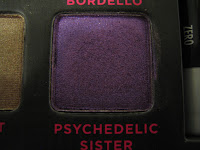
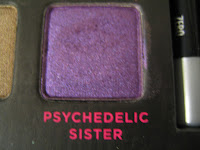
Psychedelic Sister
This went on the bottom of the crease and onto the very top of the lid
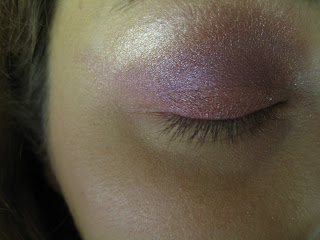
With Psychedelic Sister
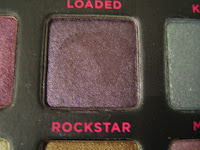
Rockstar
Rockstar went on the outer 2/3 of the crease, a little bit deeper in the crease than Psychedelic Sister
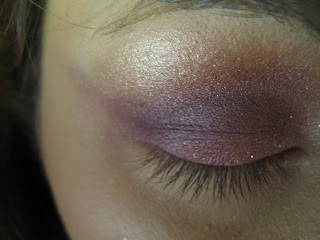
After Rockstar
Next up are the brushes I will be referring to for the next step (I used my fingers for the eyeshadows above this!) I used a fluffy blending brush (one of my mom's old MAC ones? 224?), an angled powder liner brush, and a spongey blending tool. I also ran the clean blending brush over all of my eye to help blend the shadows I'd already applied before I moved onto the next step.
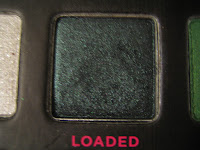
Loaded
I used the eyeliner brush to put Loaded on the outer 1/2 of the lower lashline, and then used the smudgey tool to soften the line and pull a bit of the pigment to fill the outer 2/3 of the lower lashine.
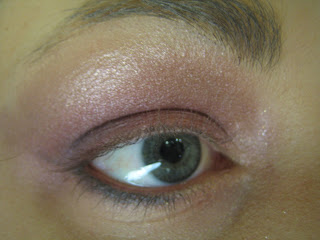
With Loaded
Psychedelic Sister
I loaded up my liner brush with Psychedelic Sister added that on the lower lashline on top of Loaded, making it a bit of a thicker line. I smudged that with the smudgey tool as well. 
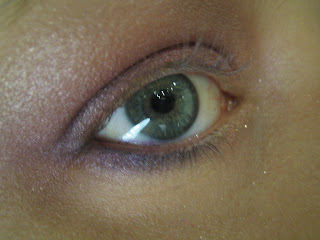
More Psychedelic Sister!
Suspect
Suspect went on the inner 1/3 of the lower lashline with the eyeliner brush/ smudger method.
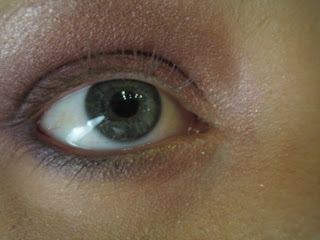
After Suspect!
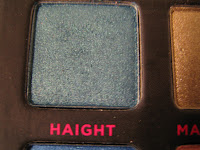
Haight
Then I used the liner brush to line the upper lashline with Haight. This one got smudged lightly as well.
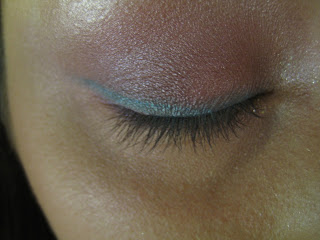
Haight
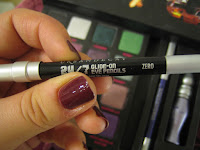
UD 24/7 Liner in Zero
I used the mini Zero that came with the set to push just a little bit of black into my upper lashline.
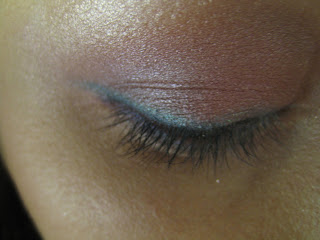
After Zero
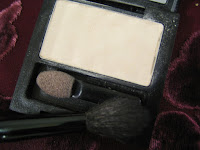
Revlon Vintage Lace (matte ivory) eyeshadow  with the foam applicator and  fluffy blending brush
At this point, I had to go outside of the glittery and dark shades that came in this palette, and I used Revlon's Vintage Lace to brighten and clean up the eye area. I used the foam applicator it came with (gross, I know! But this isn't the easiest formula to work with and this is the best way to get an opaque application) under the browbone, and then I used it loaded onto the fluffy blending brush to soften the edges of the shadow, and to clean up and brighten the under-eye area and sides of my eye.
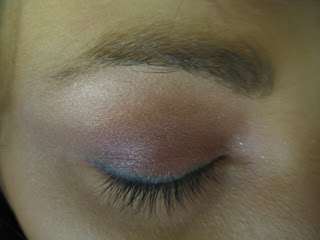
After softening the edges and adding a highlight under the eyebrow with Vintage Lace
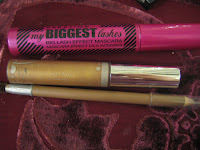
Prestige My Biggest Lashes mascara in Very Black, Anastasia brow gel in Caramel, Prestige  Brow Perfection in Light/Medium 
I filled in my brows with the Prestige pencil, and then applied the brow gel onto the spoolie on the back of the pencil, and used that to brush my eyebrows into shape. Then I added a couple of coats of mascara to the top lashes, and a little bit to the bottom lashes. I didn't curl my eyelashes! I know! Bad bad bad! 
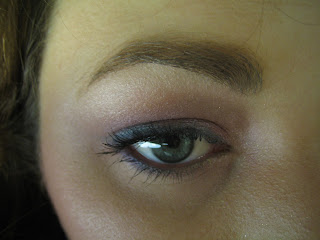
After fixing up my brows and adding mascara
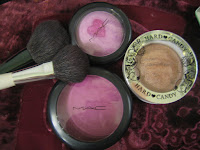
MAC blushes in Sakura (top) and Vintage Grape (bottom), Hard Candy  blush in Pin Up, and two Sonia Kashuk brushes; a small blush brush, and a fluffier blush brush. 
I used the fluffy brush loaded up with Pin Up over the entire cheek area (apple, top of cheekbone, blending down into the hollow of the cheek), focusing on the top of my cheekbone. I then used the fluffy brush with Sakura over the apple of my cheek and up towards the hairline, blending well. Finally, I used one side of the smaller blush brush with the darkest shade in Vintage Grape on the lower 1/3 of my cheek, into the hollow. 
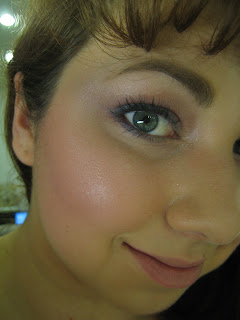
After blush!
Buxom Big and Healthy  Lip Stick in Sydney 
I applied Sydney over the entire lip.
Lips with Sydney
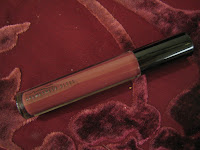
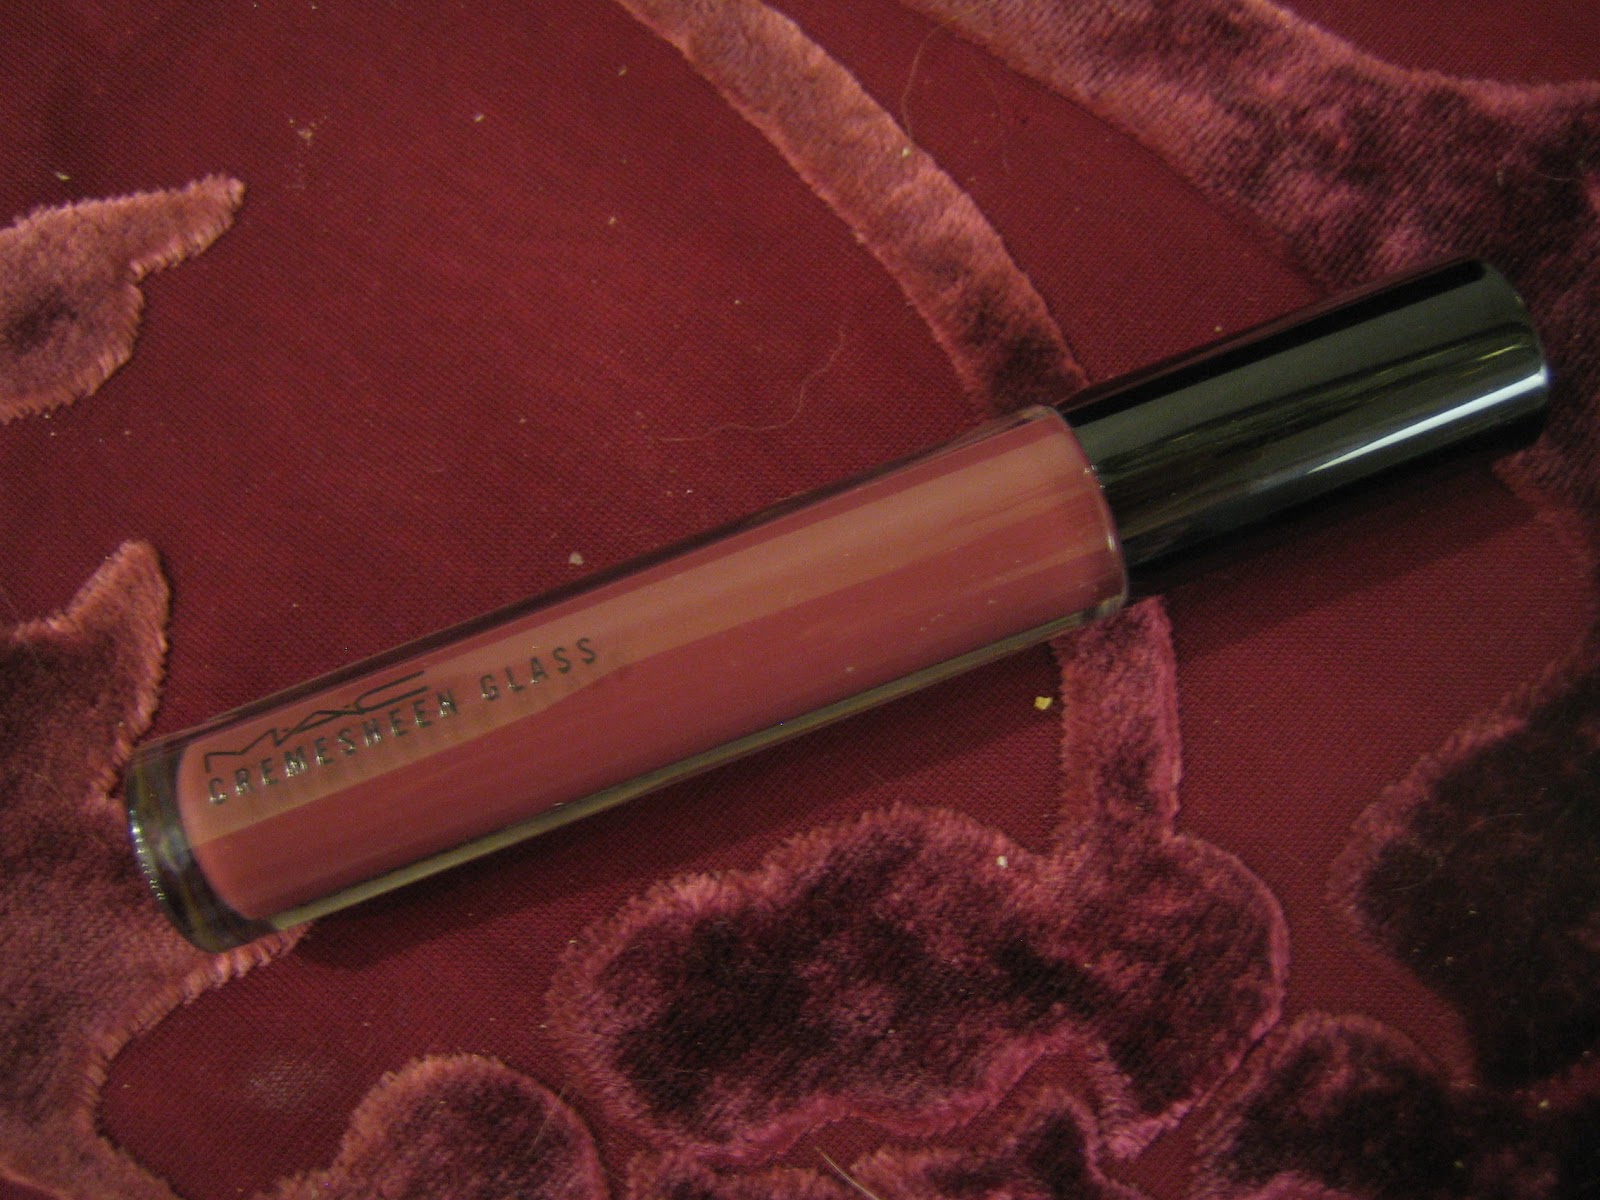
MAC Cremesheen Glass in Richly Revered
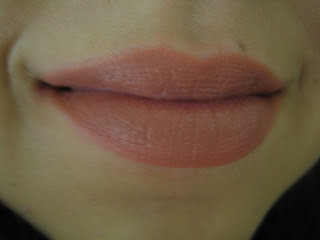
I added Richly Revered lightly over the entire lip.
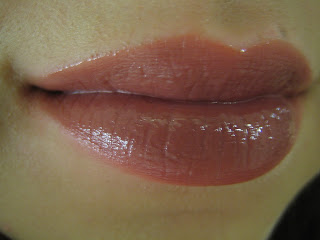
MAC Richly Revered over Buxom Sydney
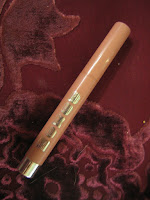
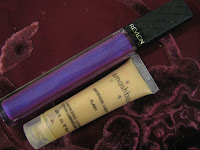
Revlon Colorburst in Decadent and Smashbox Artificial Light in Flash
I put a little dot of Flash on my cupid's bow and blended out, and applied a dab of Decadent in the center of my bottom lip and smushed to add a bit of purple iridescence.
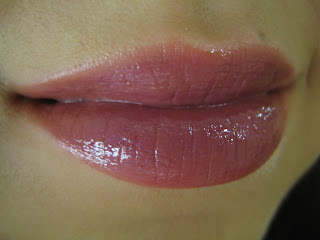
With Decadent and Flash
Here is everything that went into this look:

And the finished product in different light:


Phew! Are you as tired from reading this as I am from typing this all up!? So, this is what a more detailed breakdown of a look of the day ends up looking like... Long! But hopefully helpful for some of you who are curious about how I apply color, or those of you who are looking for new ways to use your Book of Shadows Vol. III. Anyone tempted to haul yours out and dust it off?

Tuesday, January 3, 2012

Revlon Colorburst Lip Butter in Cherry Tart & Creme Brulee

I have been hearing rave-reviews of the new Revlon Colorburst Lip Butters, and being a makeup junkie, this praise did not fall on deaf ears! I saw a chock-full display at my local Bed Bath & Beyond (I love that place...) and I picked up a couple of pretty colors to try out. Are they my new favorite lip products? Well, let's talk facts first. These come in translucent, frosted tubes with a quilted patter on it that are the shade of the product inside. They also have a clear window on top so you can see the product more clearly.

Cherry Tart (shade 070) is a bright blue-based red with fine gold and multi-colored shimmer strewn throughout. Creme Brulee (shade 095) is a pink-beige nude with less noticeable gold and multi-colored shimmer. The formula for these behaves identically on the lips for me; both are very creamy, and the opacity is buildable. Rather than a truly translucent tinted lip balm, these have a faint milkiness to them that feels incredibly creamy and cushiony on the lips. I guess Lip Butter is a pretty accurate way to describe the look, opacity, and feel of these! However, because these aren't truly opaque and are buildable, application is very forgiving. I should also mention that these look really glossy on the lips! Not a full-on wet gloss, but glossier than your typical satin-finish lipstick. According to the Revlon website, these are a gel formula with sheer to medium coverage, which sounds about accurate to me. They also say that the formula includes mango,coconut, and shea butter. Who knows, that could just be a gimmick, but I love the idea that mainstream makeup companies are moving to include nourishing, natural ingredients in their products. Like I said, I do find these hydrating; the website claims a 156% increase in hydration!   You should be able to find these for around $6.50, and they contain .09 ounces of product.

Here's a peek at the goods!

Revlon Color Burst Lip Butters

Revlon Lip Butter labels

And the clear window at the top! 

And here are Cherry Tart (on the left) and Creme Brulee (on the right) swatched generously. You can see a bit of build-up at the bottom, which might give you some insight into the opacity and creamy texture. You can also see where it gets sheer at the top.  

Revlon Colorburst Lip Butter; Cherry Tart and Creme Brulee

And here I am wearing Creme Brulee; this was after several passes on my lip to get a nice moisturizing cushion of product, and a more opaque color:

Revlon Colorburst Lip Butter in Creme Brulee
 And a close-up of Creme Brulee:

Revlon Colorburst Lip Butter in Creme Brulee
 And here is Cherry Tart! Once again, I layered this on fairly heavily, so the color is about as opaque as you can get it; one pass would get you a much sheerer tint, if that's what you prefer.

Revlon Colorburst Lip Butter in Cherry Tart

And a close-up!

Revlon Colorburst Lip Butter in Cherry Tart


While I wear these fairly thickly because that's what I prefer texture-wise, you can certainly do one pass and get a nice even, sheer wash of glossy color. I really like both of these colors; Creme Brulee is an easy way to wear nude, a shade that I find tricky to get right (especially since my favorite nude, a Prescriptives color, has been discontinued, grrr!). Cherry Tart is a great bright red that really brightens up my face and adds some nice color, without looking as severe as an opaque red lip can. I can't wait to get a more "every day" color in a pink or mauve, since these are so easy to wear and a great formula. I have no complaints so far!

Has anyone else tried these yet? Do you have any colors you'd recommend? 

FOTD: Urban Decay Book of Shadows IV

Hello, all!

I was inspired to use my Book of Shadows IV after going back through all of the pictures I took of swatches from the palette the other day. It's not a palette I reach for very often; it's big and bulky, and the colors, while wearable, aren't really of the "everyday easy" sort. They're not the tried-and-true types of shades I normally reach for, and I'm lazy, so clearing off a few extra inches of space to set this thing up on is never appealing. However, I went to aaaaall that trouble (read: 10 seconds of reorganizing) to haul this thing out today, and did a look using it!

Here are the goods:


Face: I applied MUFE Face & Body Makeup lightly all over my face, followed by Bobbi Brown Creamy Concealer in Ivory under my eyes on on my nose. I lightly applied Benefit Hoola on the sides of my face and under my cheekbones, and then Benefit Georgia (so sad this is discontinued!) on my cheeks up towards my hairline, and lightly across the tip of my nose and chin. I used Fresh Face Luster in Seventh Veil lightly across the rest of my face, followed by Tarte's Amazonian Clay 12-hour Blush in Exposed, Hard Candy Blush Crush Baked Blush in Pin up on the top of my cheeks up into the hairline, and Urban Decay Afterglow Glide-On Cheek Tint in Quickie just on the apples of my cheeks.

Eyes: I prepped my eyes with NARS Smudgeproof Eyeshadow Base. Then, from the Book of Shadows IV Palette, I patted Bust from lashline up through the crease, Lost in throughout the entire crease, with a touch of Cobra to define the deepest part of the outer 2/3 of the crease. I then patted some of Baked on the outer 2/3 of my brow bone just above the crease, Sin on the inner 1/3 angling down to the tear duct, put a little bit of Skimp just under the eyebrow and in the tear duct, and dusted some Gravity on the outer corner of my eye and across the top of the crease. I used Urban Decay's 24/7 Eyeliner in Rockstar on the upper lash, and the outer and inner 1/3 of my lower lash (leaving the middle 1/3 unlined). I put a bit of lost over the outer 1/3 of the lower lash line, and then dusted Baked over the outer corner of the lower lash pulling it up to meet the shadow in the outer corner of my eye. I then used Urban Decay's Supercurl mascara, and then used Prestige's Brow Perfection pencil in Light/Medium to fill in my brows, and Anastasia Tinted Brow Gel in Caramel to set.

Lips: I used NARS Velvet Matte pencil in Bahama on the entire lip, Sephora Rouge lipstick in R21 in the center of the lower lip blended out, and then a dab of Buxom Lip Polish in Naomi lightly in the center of the lower lip.

And here is the look!


Some close-ups of the eyes:


A close-up of the lips:


So there you have it! It's not the wildest eye look ever, but it's a fun take on a more basic everyday eye look I might do with just a zip of extra color.

Monday, January 2, 2012

New Year... New Product!

Hi Guys!

I wanted to write up a quick post to show you some new goodies I've acquired recently :)

"Oh no! Mommy got even more makeup?!" 

THE BAGS


The one is fairly obvious... As to the unmarked white bag, TREASURES AWAIT. It's from the Cosmetic Company Outlet. The closest one to me is an hour away through windy country roads, and I get carsick, so this was no bueno. However, I totally scored!

I purchased two items at the outlet; MAC Mineralize blush in "Sakura," a LE product from the "Quite Cute" collection I regretted passing up, and a Bobbi Brown corrector in Light Bisque. I have the concealer that this is meant to be used with, and I was bummed out that I never bought the corrector on its own, since now they've switched to the "corrector/concealer" sets.

As for the MAC bag, I picked up three items from the Daphne Guinness collection; the blush in Vintage Grape, which is an ombre with red and purple tones, a dark dirty/milky burgundy Cremesheen Glass called "Richly Revered," and a dark burgundy with a touch of taupe Pro-Longwear Lipcreme  in "Approaching Storm". I also got a permanent MAC Paint in Untitled.


So far I am enjoying experimenting with my new goodies! I'll show you guys some swatches soon. Have you ever been to the Cosmetic Company Outlet? For those of you who may not have experienced the awesome, I feel like I should add a bit of an explanation; it's an outlet for Estee Lauder brands, so they carry department store makeup brands owned by Estee Lauder, like MAC, Bobbi Brown, Origins, Estee Lauder (of course!), and Clinique, as well as some other brands owned by Estee Lauder that may or may not have their own counters, like Ojon, Flirt and American Beauty (cosmetics brands sold at Kohls), and a variety of fragrances. They have mostly discontinued products, things in older packaging, and products from LE collections that have been cycled out. For instance, when I was there, they had assorted items from the MAC Quite Cute, Surf Baby, Wonder Woman, Marcel Wanders, and Venomous Villains collections. They don't have the full collections, and the selection in general is hit-or-miss; if you want a mascara or some powder or a red lipstick, you'll likely find something, but you probably won't find a specific shade in a specific formula in a specific line. Not a great place to rely on for basics (unless you know they frequently stock what you use!), but it's a wonderful place to browse and be surprised.

Hope you enjoyed seeing a hint of some of my new playthings, I'll give you a better peek after I've had some more experience with them and have a little more to say!

Sunday, January 1, 2012

Urban Decay Book of Shadows IV Swatches

Hi all, and Happy New Year!

I took these pictures awhile back and never really got around to posting them... oops! Anyway, seeing as how Urban Decay's Book of Shadows IV has gone on sale from $64.00 to $44.00 on their website, I thought now might be a good time to post these! For those of you who haven't picked up this palette yet and are thinking about it because of the newly-slashed price, hopefully these swatches will help you decide if it's something you need to have or not!

The Urban Decay Book of Shadows have been criticized in the past for their bulky size, and this one is even bigger, housing a pop-up butterfly scene, a tiny keychain speaker that can be plugged into your phone or ipod (I've used it! It's not awful, but not great, either), 16 shades of eyeshadow, a full size 24/7 Liquid Liner in Perversion (black), a mini Primer Potion, and a mini Supercurl Curling Mascara. Also included are cards with QR codes for you to scan to pull up how-to videos on a mobile device. This is a cute idea, but I'd like to see these in addition to a booklet. Let's be honest here: the shadows are the star of the show, and they're what people buy the palette for, although I have to say I was pretty excited to have another full-size 24/7 Liquid liner.

As for the shadows themselves, you're getting a total of .48 ounces of product. That is roughly 9.5 regular Urban Decay eyeshadows, which retail for $17.00 each, making this  about $160 worth of eyeshadow for $44.00. Not bad, provided you like the colors and will use them!

Speaking of colors... The shades included are: (taken from the website) Baked (shimmering bright copper), Bender (shimmering dark mossy green), Blue Bus (bright blue w/ purple shimmer), Bust (taupe brown with subtle gray shimmer), Cobra (sooty black w/ golden shimmer), Crystal (light silvery blue w/ multi-dimensional shimmer), Gravity (deep vibrant purple w/ multi-dimensional glitter), Gunmetal (dark metallic silver w/ silver sparkle), Hijack (greyish green w/ blue and green shimmer), Lost (shimmering dark brown), Midnight Cowgirl (shimmering gold w/ gold sparkle), Midnight Rodeo (metallic medium brown w/ silver and gold glitter), Missionary (light taupe w/ pink shimmer), Sin (shimmering champagne), Skimp (shimmering ultra-light nude), Zephyr (shimmering off-white).

Here is the palette:

Urban Decay Book of Shadows IV

And what you see when you lift up the lid...

Inside the Urban Decay Book of Shadows IV

And here are the goodies inside the drawer!


Here's a close-up of the shadows themselves:


I've swatched each column from top to bottom, so there are four groupings of four:

Here is the first, with the 24/7 liner in Perversion swatched next to the shadows.

Top to bottom: Blue Bus, Bender, Midnight Cowgirl, Bust

And the second column:

Top to bottom: Gunmetal, Gravity, Sin, Missionary

And the third column...

Top to bottom: Cobra, Lost, Midnight Rodeo, Skimp

And finally, the last column!

Top to bottom: Baked, Hijack, Crystal, Zephyr

As you can see, some of these are more pigmented than others; the shades that have glitter in them (Midnight Cowgirl, Midnight Rodeo, and Crystal) have the typical fallout issues that plague this Urban Decay formula, and some of these run remarkably sheer (Missionary, Crystal, Skimp). Now, honestly, when I use Missionary and Skimp, they don't feel sheer to me, just light. They're great for blending the bolder colors in their family in this palette without giving a super frosty look that some pale shades that are very pigmented or shimmery can impart. I do wish Crystal wasn't as sheer, though, because it is such a gorgeous light blue in the pan! It's also a possibility that you already own a number of shades in this collection, and maybe don't like the new shades enough to justify the purchase, but that's always something to consider with the UD palettes.

Do you need this? Maybe! It's bulky and you might end up with some doubles, but there are some really gorgeous shades in this collection. My favorites are Bust, Missionary, and Lost because they are versatile neutrals, but if you're a blue and green fan, I'm sure you'll find yourself falling for Hijack, Cobra, Blue Bus, and Bender, as they're all lovely colors. Aside from the shades I've mentioned specifically as being sheer or having fallout issues, most of these are the classic, velvety, pigmented UD formula we know and love.

You can find this discounted on the Urban Decay website here: http://www.urbandecay.com/book-of-shadows-eyeshadow-iv/310,default,pd.html?start=5&cgid=12

Do you guys already own it? How do you like it? I don't find myself reaching for mine as often as I'd like, but every time I pull it out, I am impressed by the ability to do an entire eye-look with the tools provided; there are nice highlight colors, a liner, mascara, primer...  And not every shade is glittery or really bright, so you can do looks with several shadows from this set and not look like a clown! I hope Urban Decay will continue offering that type of range in their Book of Shadows in the future.